Yes.
I know I went AWOL for a week.
However, the reason is valid and I'd sacrifice my work for it.
Alright so...
During this week I've not completely forgotten about Project New World. In fact after much consideration, I've come up with a drastic change of plans in my production pipeline.
After all the hard work I've been through, I'm discarding my current rig. I've decided to try out the new rigging solutions provided by my advanced rigging module in school.
Well at least all the effort had not gone to waste since my rigging knowledge has improved greatly, giving me an upper-hand when dealing with the upcoming advanced rigging lessons.
Starting from tomorrow, I'll work on new models for Project New World. (finally something less technical and more visually appealing)
Looks like I've gotta put my animation challenge on hold again.
Sunday, October 30, 2011
Friday, October 21, 2011
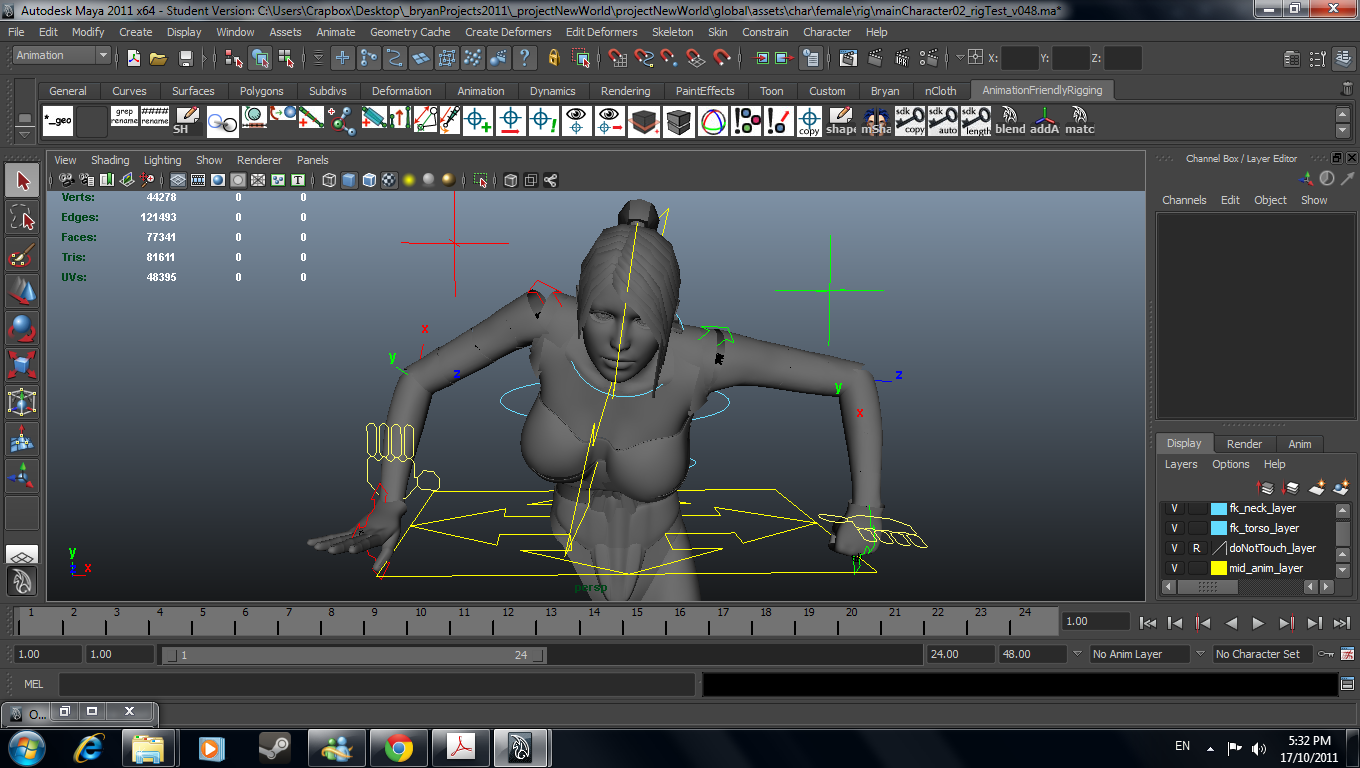
Rigging Update - Main Character pt 10 Mirror Complete
I've finished rigging all the limbs of the main character.


I don't know what to say...
I'm just... VERY HAPPY! (and exhausted)
Mirroring the joints, constraints, ikHandles, connections, attributes and driven keys was not as easy as I expected it to be.
I was kicked in the arse multiple times before I finally succeeded. Well, whatever, the fact that I can construct an awesome pose using the rig proves that my hard work paid off.
However, the class isn't complete though. I'm left with the final lesson, creating a User-Interface and limiting the controls of the rig.
After the rig is done, I shall finally work on my first animation challenge.
Monday, October 17, 2011
Rigging Update - Main Character pt 9 Right Hand Complete
I've finally managed to setup the right hand rig for my character using mirror joints and MEL scripting.
I took about 5 days to finally finish just the right hand.
Why so long? Because I had to keep coming up with new methods to mirror the joints, animation controls, constraints and set driven keys. I kept failing many times. However my morale will not go down just because I'm stuck in such situation. Like I said before and will say many times in future, I will see through the success of Project New World.

"Dammit! Where's mah coffeh!"

"And where's mah right leg eh!?
So now I'm left with the last step, the right leg.
Ho ho! This is getting exciting.
I'm one step closer to doing my first animation challenge.
I took about 5 days to finally finish just the right hand.
Why so long? Because I had to keep coming up with new methods to mirror the joints, animation controls, constraints and set driven keys. I kept failing many times. However my morale will not go down just because I'm stuck in such situation. Like I said before and will say many times in future, I will see through the success of Project New World.
"Dammit! Where's mah coffeh!"

"And where's mah right leg eh!?
So now I'm left with the last step, the right leg.
Ho ho! This is getting exciting.
I'm one step closer to doing my first animation challenge.
Thursday, October 13, 2011
Rigging Update - Main Character pt 8 Leg Complete


Left leg rig setup has been completed. I've gotten quite used to setting up fk/ ik controls using setDriven keys and expressions to prevent counter-animation possibilities.
Now I'm left with the last class, mirroring the rig setup from the left to the right, adding final touches and tidying up the overall hierarchy.
Wednesday, October 12, 2011
Rigging Update - Main Character pt 7 Arm Complete


The wrist and fingers rig was mostly setup using setDrivenKeys. I had to create a custom hand control using curves as shown above. The curve control which I created is very important because instead of setting up controls on each finger joint, I used setDrivenKeying to enable maximum control of each and a bunch of individual fingers by just referring to the attributes in the channel box.
A little bit of copy and pasting of names and values in the MEL script was done as it would have been tedious to keep setting driven keys back and forth.
Screenshots: A few out of many achievable poses with current rig shown below.


When setting up a clenched fist pose, the fingers tend to lose some volume, causing the hand to look rubbery. I have a little plan to cheat my way out of that since it's gonna be an unnecessary waste of time if I re-model the hand. How will I do that? Well the main character is equipped with a pair of gloves (special gloves in fact which I will explain why in time to come) that are supposed to have extra "stuff" on it all thanks to world sci-fi fantasy.
For the advanced rigging class, I've been through 5 lessons so far and I admit, they're reeeaaaaally tough.
There are 2 classes left and once I've finished rigging up this character, I'll start my own very first animation challenge! I plan to do these side animation challenges while keeping up with my main production schedule.
These animation challenges will not be related to the animated series New World in any way, except for the fact that they do help me practice my animation.
I'll post these animations online soon so let's see how it goes!
Tuesday, October 11, 2011
Rigging Update - Main Character pt 6 Arms

Belive it or not, I spent one whole day, yes,
One whole day yesterday setting up the rig for the left arm excluding the fingers and I went to sleep straight away after I was done.
Last time I did my own custom rig, I spent half a day only. With that you can see the vast technical difference between advanced rigging and my initial knowledge of simple rigging which wasn't really that simple either.
I do not wish to explain in detail how much pain I've gone through to finally complete the setup.
All I can say is that the rig consists of fk/ ik rig setups for the upper and lower arm, plus a lot of other bonus controls like setting the visibility of ik and fk controls and animation fk/ ik choice settings using the expression editor and several MEL scripts.
Easier said than done.
However I pulled through and that's what counts, so let's proceed on to the fingers.
Sunday, October 9, 2011
Rigging Update - Main Character pt 5 Arms
Just a quick update, a simple test rig for an arm.


By default, the ik handle tool doesn't allow the joints to stretch beyond their scale limit when it's being translated. The first solution we might resort to is to use setDrivenKeys to do the job manually. However, class has taught me otherwise.
This Mel script setup defies the limitations of the ik handle for the arm. It is much more effective and accurate than doing it manually due to human error.
In the script, I set up initial default values which are used to reset everything. After doing so, I defined the value of the full arm length by adding both upper and lower arm length values. Then I used a setDrivenKeyframe command which defines the:
Driver,
Driver's value,
Driven Attribute &
Driven Attribute's Value.
These will then be used in such a way where, when the Driver is at its maximum length (full arm length) without stretching, it will set the translate X value of the upper and lower arm length. That's why I need those default attributes in the previous command.
Using more similar setDrivenKeyframe command setups, the script is capable of multiplying the size of the arm length when the ik handle is being translated beyond the full length of the arm. Thus allowing infinite stretching of the arms instead of limiting them to a scale of 1.
Using more similar setDrivenKeyframe command setups, the script is capable of multiplying the size of the arm length when the ik handle is being translated beyond the full length of the arm. Thus allowing infinite stretching of the arms instead of limiting them to a scale of 1.
Rigging Update - Main Character pt 4 Head Complete

Looks simple right?
Well unfortunately, it's not.


In order to achieve realistic human motion, a mixture of fk and ik rig controls had to be applied along with multiple constraints between the head, neck, shoulders and hips. Custom attributes have also been added which control the point and orient space of the head joint.
I'm one third through the advanced rigging class now and so far it has been getting more and more intense. Because I've made it this far, I've gained even more confidence in pulling through this whole project successfully.
Rigging Update - Main Character pt 3 Torso Complete


The torso rig is complete.
Now I'll proceed to rigging the head.
Here's a test file of how I'm required to proceed with rigging the neck.


When using the ik spline tool on the neck joints, I need to make sure they don't jerk or screw up when I pull any of the child joints towards the base joint.
Saturday, October 8, 2011
Rigging Update - Main Character pt 2

Usually for character rigging we have to use smooth binding between the joints and the geometry. However for now I'll stick with rigid binding by parenting split geometry parts to joints. The reason for doing is that it's much easier and less tedious to use rigid binding. This would speed things up for me while I'm learning advanced rigging instead of having to paint weights which is a painful process.

Split geometry clean up.


In the previous post, I've completed building the skeletal joint structure for the character. What I forgot to mention was that the structure's purpose was for FK (Forward Kinematics) controls. What I'm doing now is a secondary rig called IK (Inverse Kinematics) controls. With these controls, I'll have the ability to switch between FK and IK when animating my character. This would give me an advantage especially when I need to animate intense action sequences.
Friday, October 7, 2011
Rigging Update - Main Character pt 1


I've built up skeleton joints and fixed joint orientations for the main character.
I have basic rigging knowledge. Thus I'm actually capable of applying basic rig techniques such as ik and fk handles, joint controls and setting up a basic character joint structure all ready for animation. However due to the complexity of the animations I aim to achieve, I'm currently following a classified advanced rigging class which I shouldn't be at liberty to share due to legal matters.
Despite that, I would still keep this blog updated with summarized steps and progress, during this hardcore rigging process which I aim to complete by Wednesday.
Wednesday, October 5, 2011
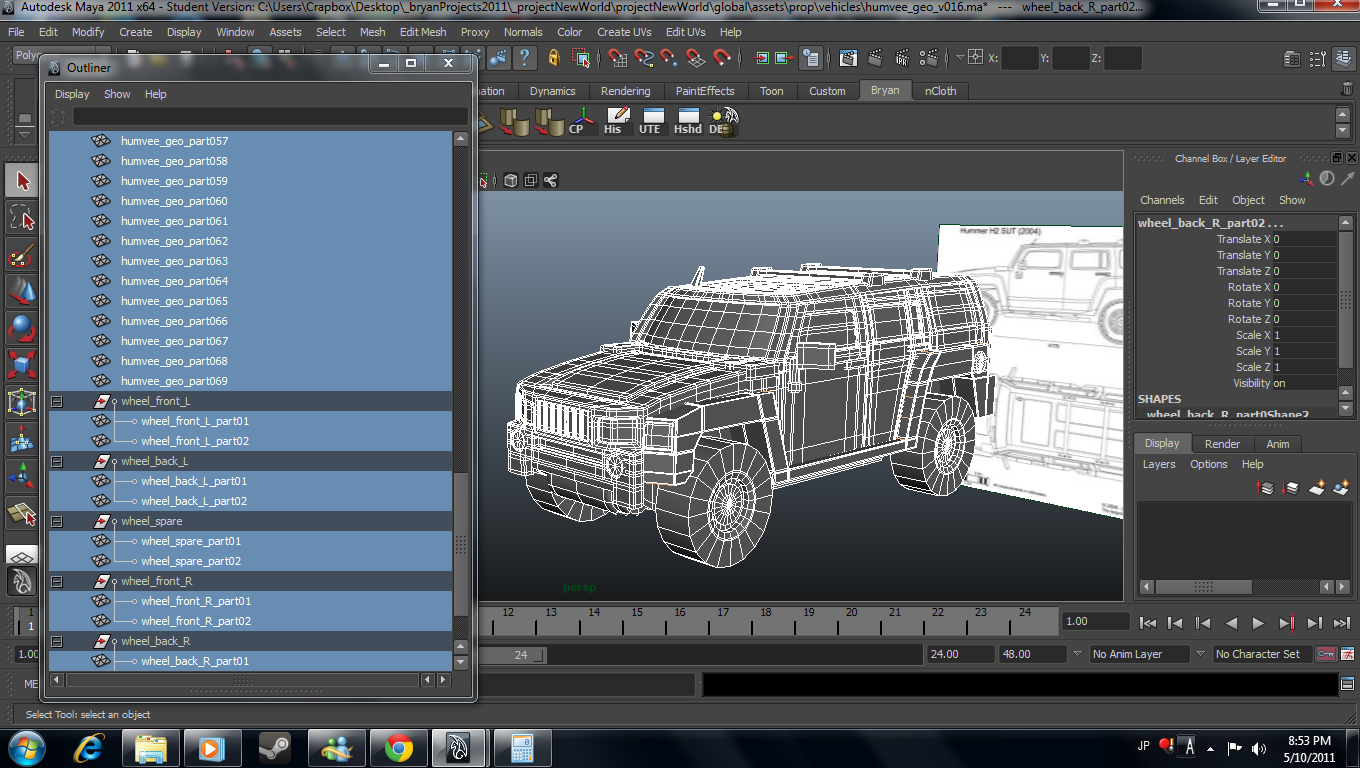
Model Update - Humvee
Although my plan for this week was to finish rigging the main character, some plans have been changed.

I've just launched another project, Project Dead Punk which can be accessed through the navigation at the side of this blog.
I'm almost finished modeling an armoured vehicle which would serve as a mode of transport for the main character. I will also use the same armoured vehicle geometry for Project Dead Punk.

-
8.54pm


The humvee model is complete.
Now, let's proceed on to rigging.
8.54pm

The humvee model is complete.
Now, let's proceed on to rigging.
Subscribe to:
Comments (Atom)